Lesson 1.2 — Reviewing a Driver Record
What this lesson is
This lesson covers what happens after you post a job: how a driver ends up on the ProHRHQ board, where they sit in the recruiting pipeline, and how to read the driver record before you send the driver to the carrier. When you finish, you will be able to take a candidate from a resume in your hand to a record on the board, and review the record well enough to decide what to do next.
The one rule that matters most
Everything on the driver record is private. This is not just our policy. It is federal law.
Under 49 CFR § 391.53, the driver investigation history file — which is what we are holding when we work a driver record — "must be maintained in a secure location with controlled access," access "is limited to those who are involved in the hiring decision," and the data "must only be used for the hiring decision."
The safety performance history part of the record has its own confidentiality rule under 49 CFR § 391.23: prior-employer records must be protected from disclosure to anyone "not directly involved in forwarding the records."
What this means for you:
- Do not take screenshots of the driver record.
- Do not email, text, or share it on any chat or messaging app.
- Do not show it to anyone outside ProHRHQ except the specific carrier you are placing the driver with.
- Do not use it for anything other than the hiring decision.
Why the screenshots in this lesson are redacted. The dark gray boxes on the screens below cover real driver names, emails, phone numbers, signatures, and recruiter notes. The lesson teaches the layout of each page, not the contents of any one driver's file.
Step 1 — Get the driver onto the board (Parse Resume)
The driver gets onto the board through the Parse Resume page (Kanban > Parse Resume, or the Recruiter menu). The resume usually comes from Indeed, but it can be from anywhere — a referral, an emailed PDF, a ZipRecruiter profile, a resume the driver handed you. The parser handles any resume.
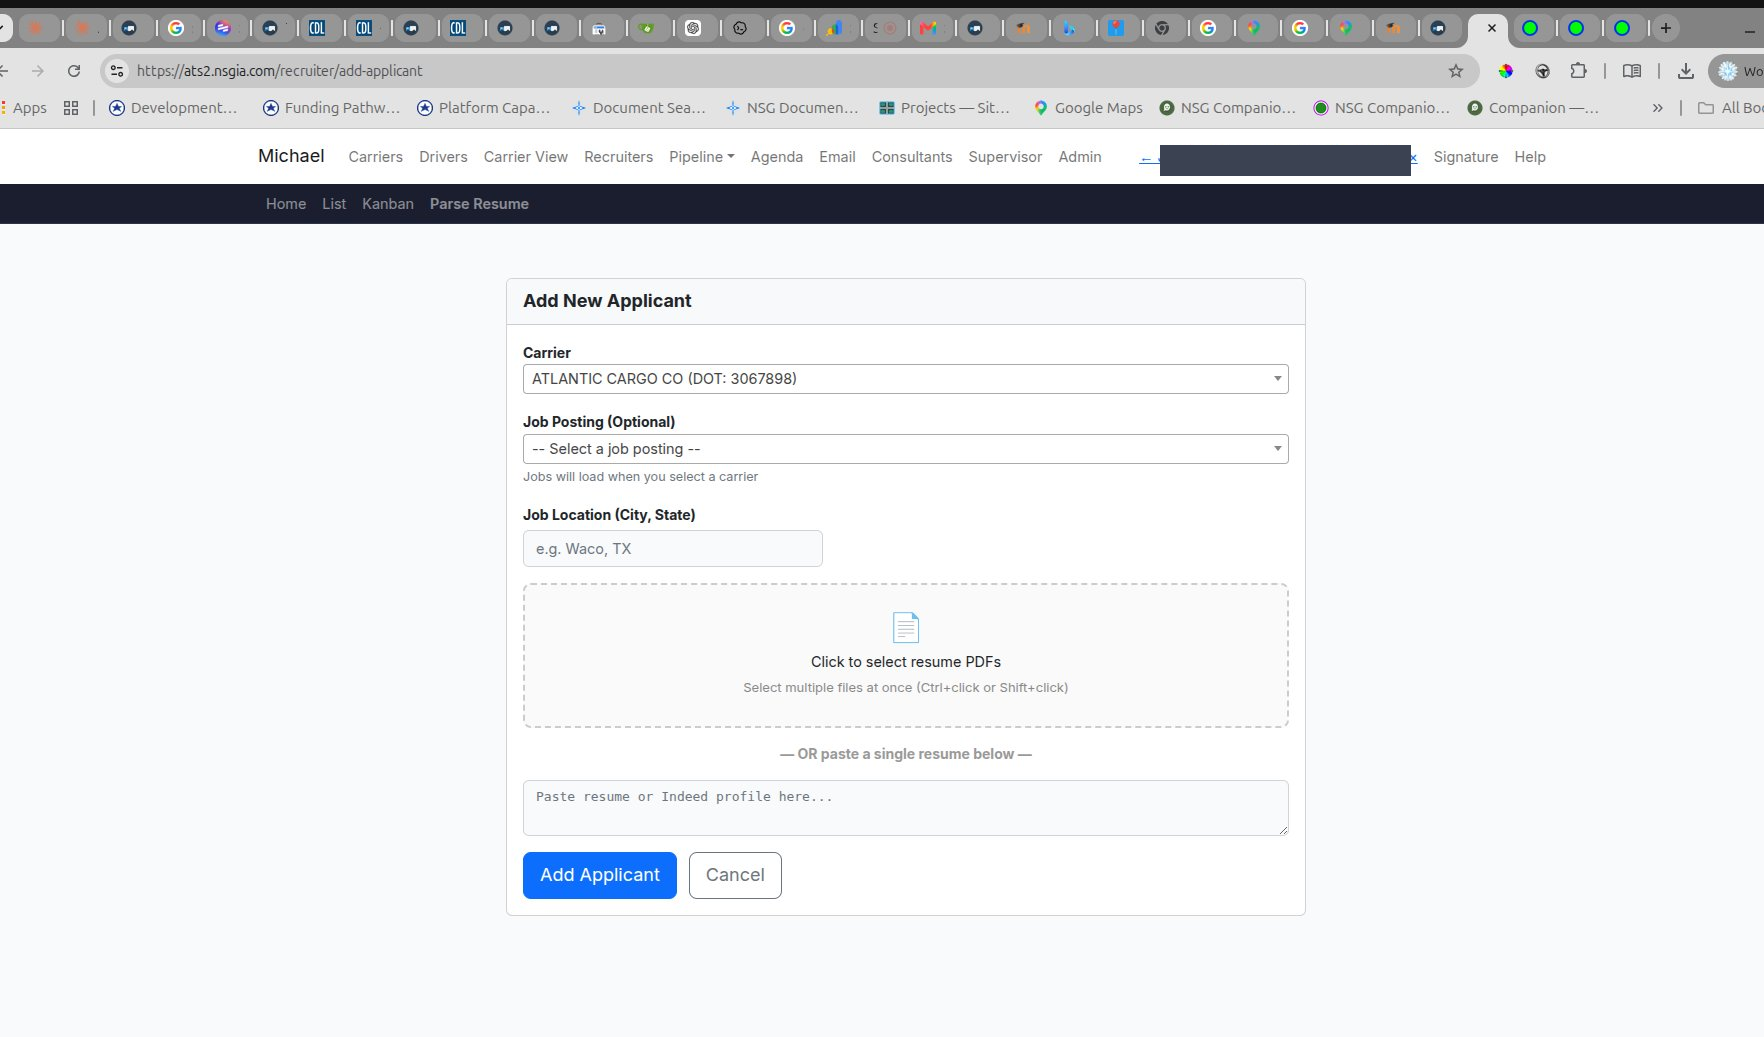
On the Parse Resume page:
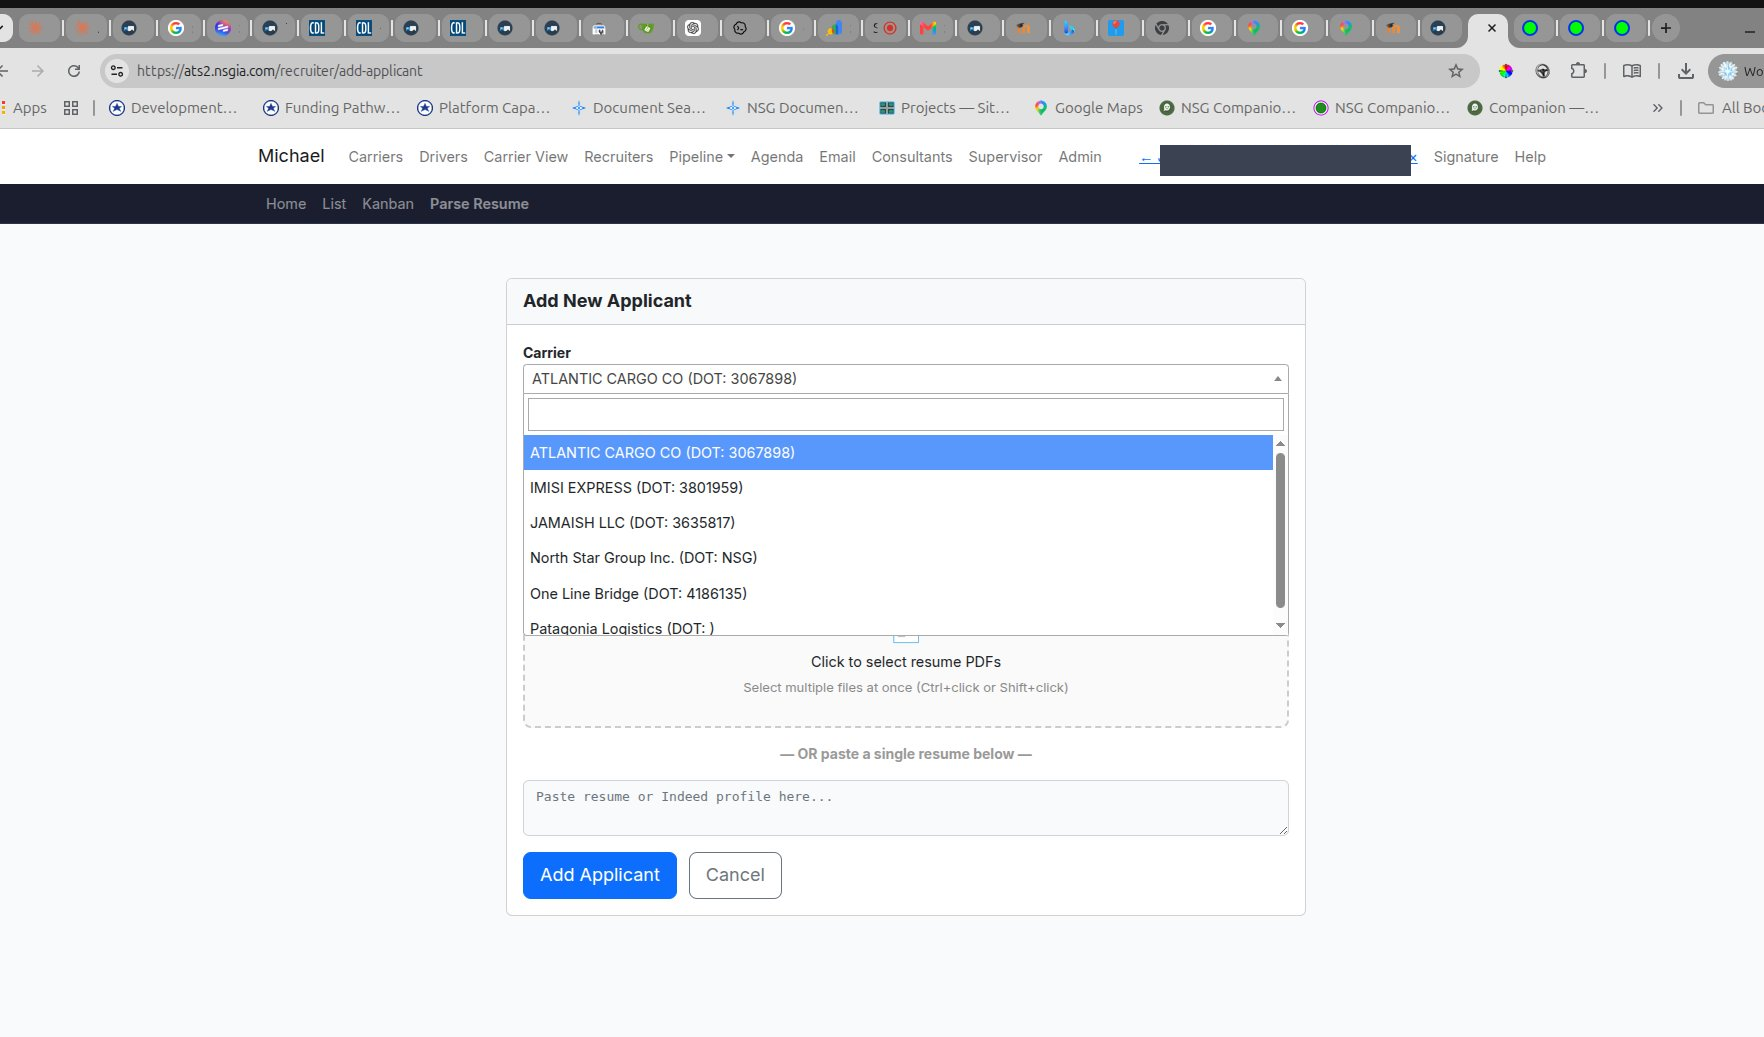
- Pick the carrier from the dropdown. Each carrier shows its USDOT number, so you pick the right one.
- Pick the job posting (optional). The job postings list loads after you pick the carrier.
- Enter the job location (city, state). This is the city the job runs out of, not the driver's city.
- Either upload the resume PDF (one or many at a time) or paste the resume text into the textarea below.
- Click Add Applicant.
The parser then pulls these fields automatically:
- Name
- Email — often an anonymized proxy address like xxx@indeedemail.com when the resume came from Indeed
- Phone — when the resume has one
- City and state
- Employment history — employer names, positions, and date ranges for the last three years
What the parser does not get: USDOT numbers, license details, medical card, accident records, traffic violations, prior-employer contact info, signatures. The driver fills those in themselves when the application invitation reaches them. That's the convenience for the driver — most of their application is already filled out from their resume by the time they see it. They only fill the gaps and sign.
Step 2 — Reading the Kanban
After Add Applicant runs, the driver shows up as a card in the Kanban. The Kanban is the visual pipeline. From left to right, the columns are:
- New — just added by the parser, application has not been sent to the driver yet.
- Application Sent — the application invitation has gone out to the driver.
- Application Received — the driver has filled it out and signed.
- Carrier Acceptance — the package has been sent to the carrier for their review.
- Employed — the driver was hired.
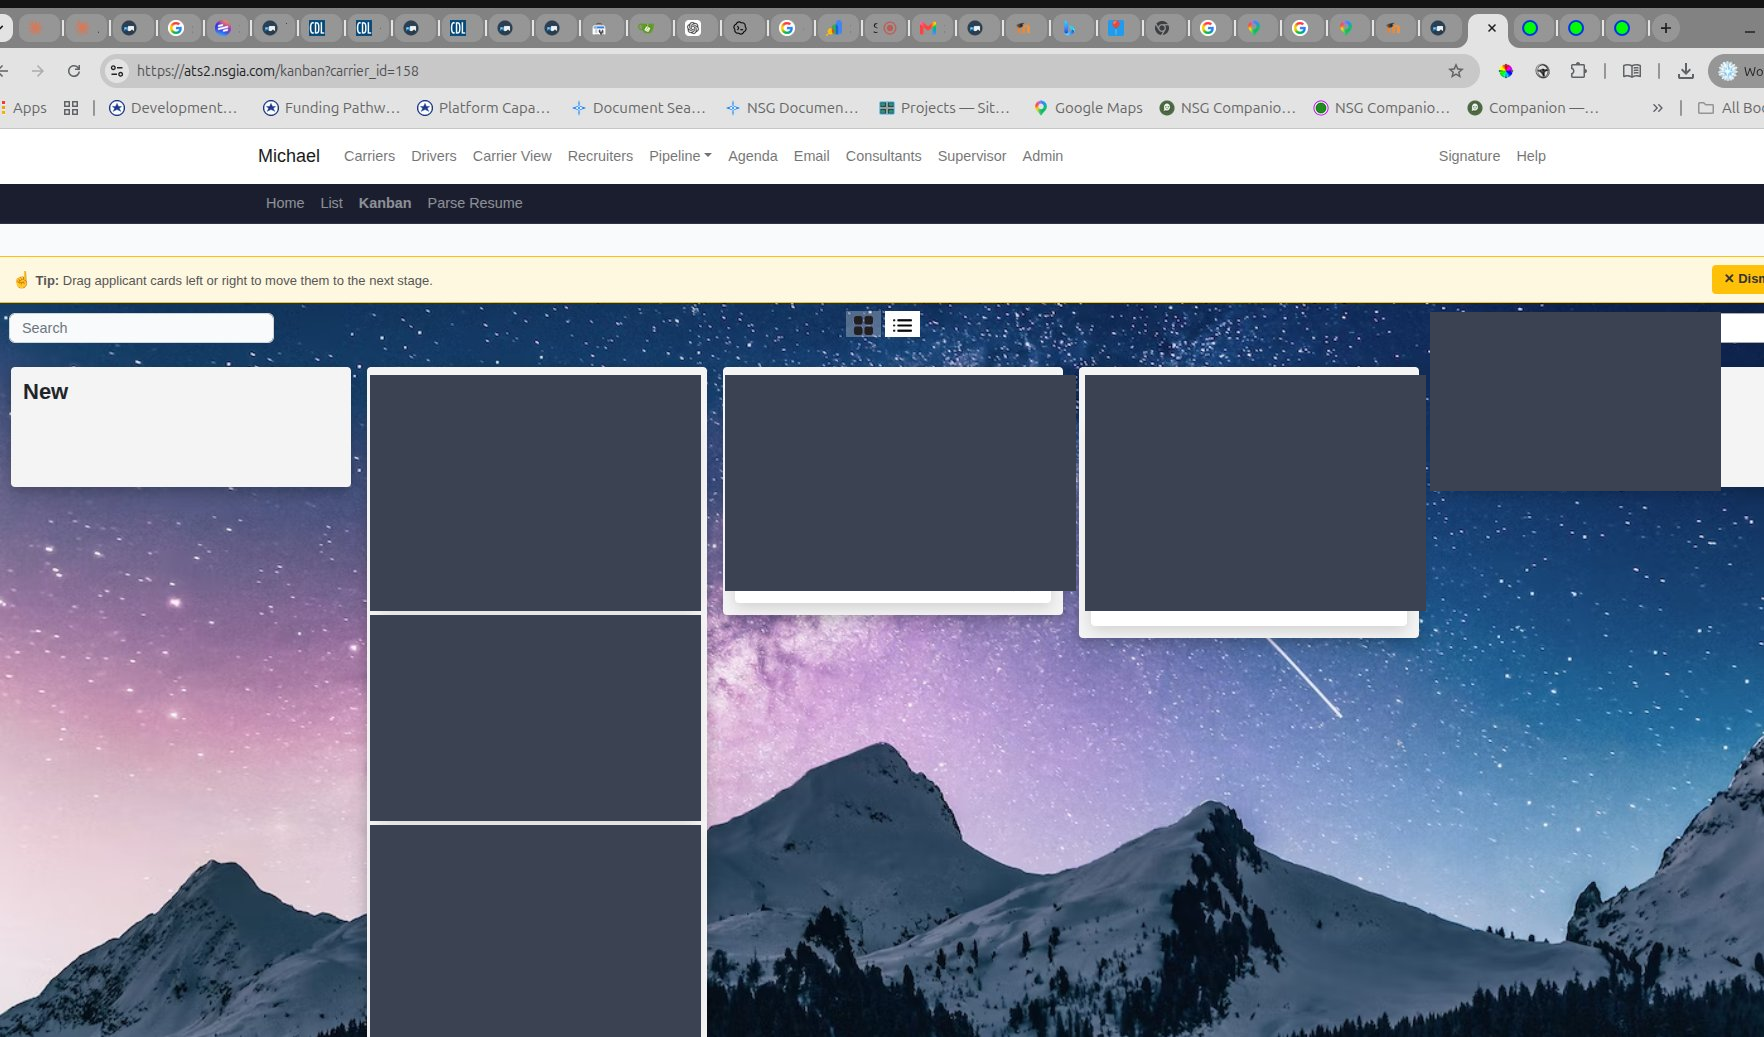
Each card shows: driver name, email, phone, location with miles-to-job, the carrier, and a contacts count. Drag cards across columns as the status changes. Filter the board at the top right by carrier — pick a carrier to see only that carrier's pipeline.
Step 3 — Opening the driver record
Click the driver's name on any Kanban card. That opens the driver record — the page where everything about this driver lives.
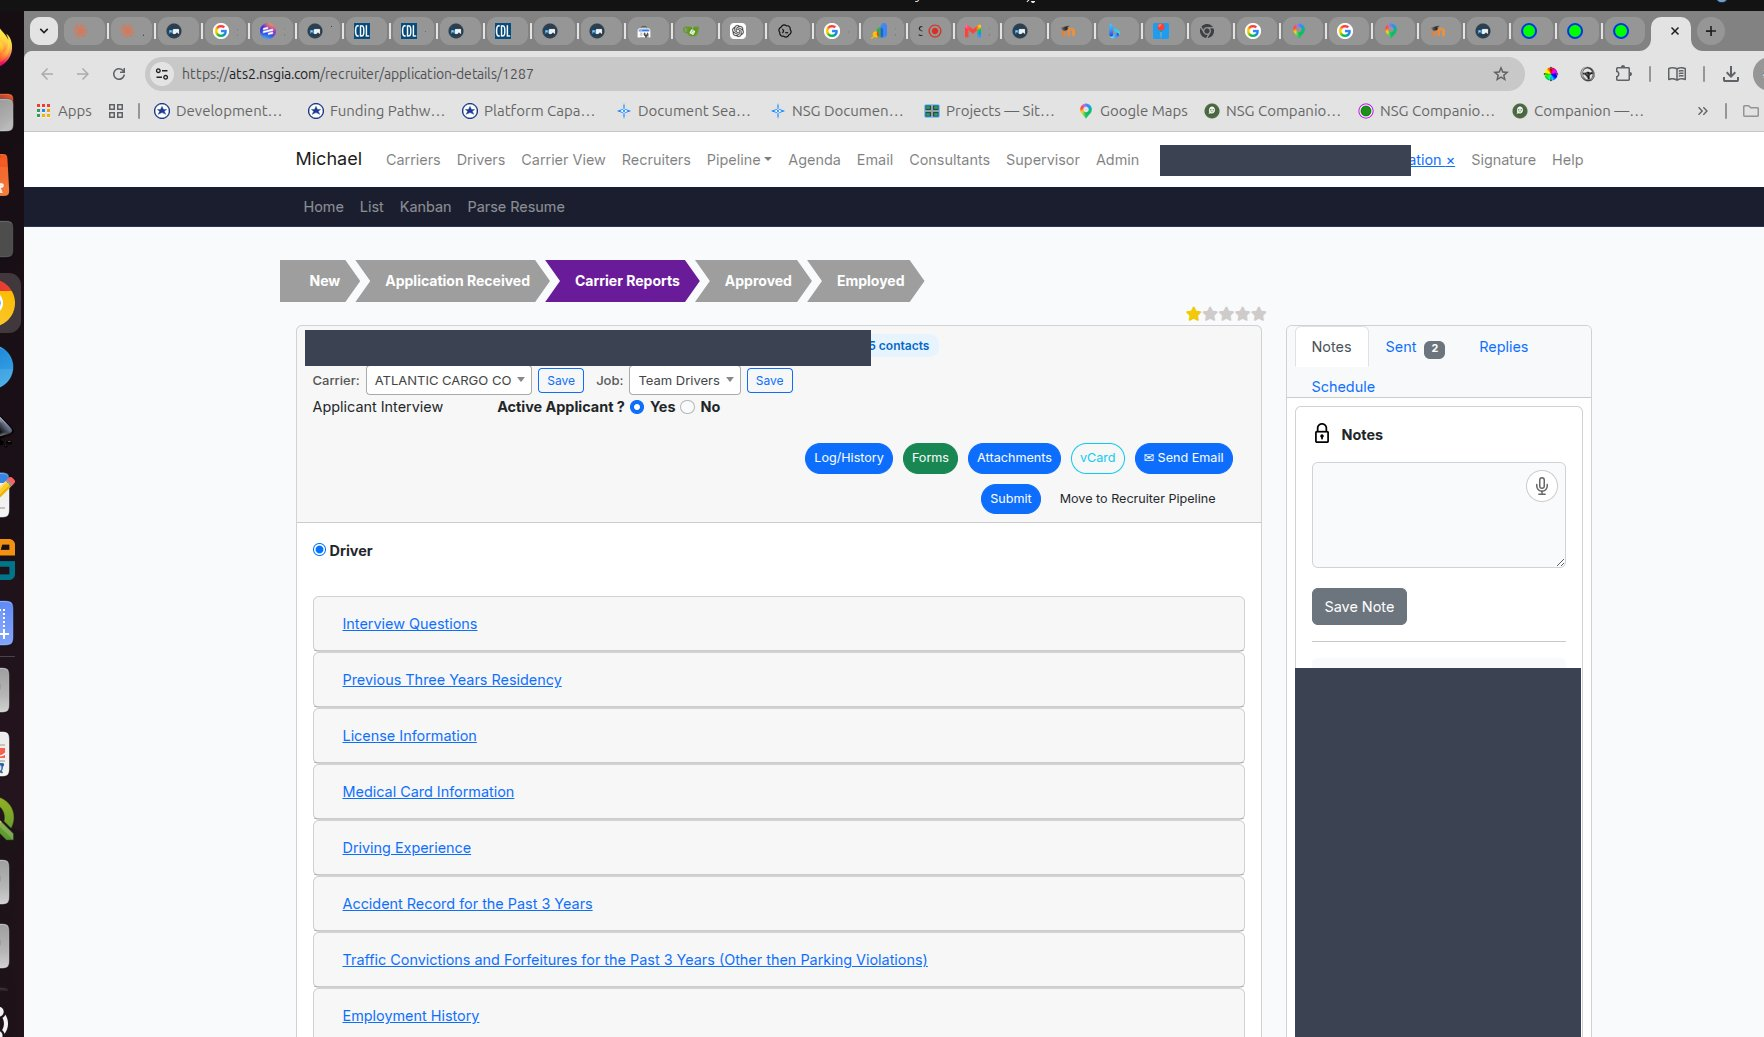
What's at the top of the page, left to right:
- Name, phone, email, location
- Contacts count — how many times anyone at ProHRHQ has reached out to this driver
- Star rating — your own quick rating of the driver
- Carrier and Job — which carrier and which posting this driver is being matched to
- Applicant Interview — has someone interviewed this driver yet?
- Active Applicant Yes / No — is this driver still being actively worked?
Below the top bar is a row of action buttons: Log/History, Forms, Attachments, vCard, Send Email, Submit, Move to Recruiter Pipeline.
Step 4 — The green Forms button
The Forms button has a color: green means the driver has signed all the FMCSA forms. If the button is not green, the driver has not finished signing yet, and you should not send the record to a carrier.
When you click the green Forms button, a panel opens with all eight FMCSA forms, each prefilled from the driver's application and signed by the driver:
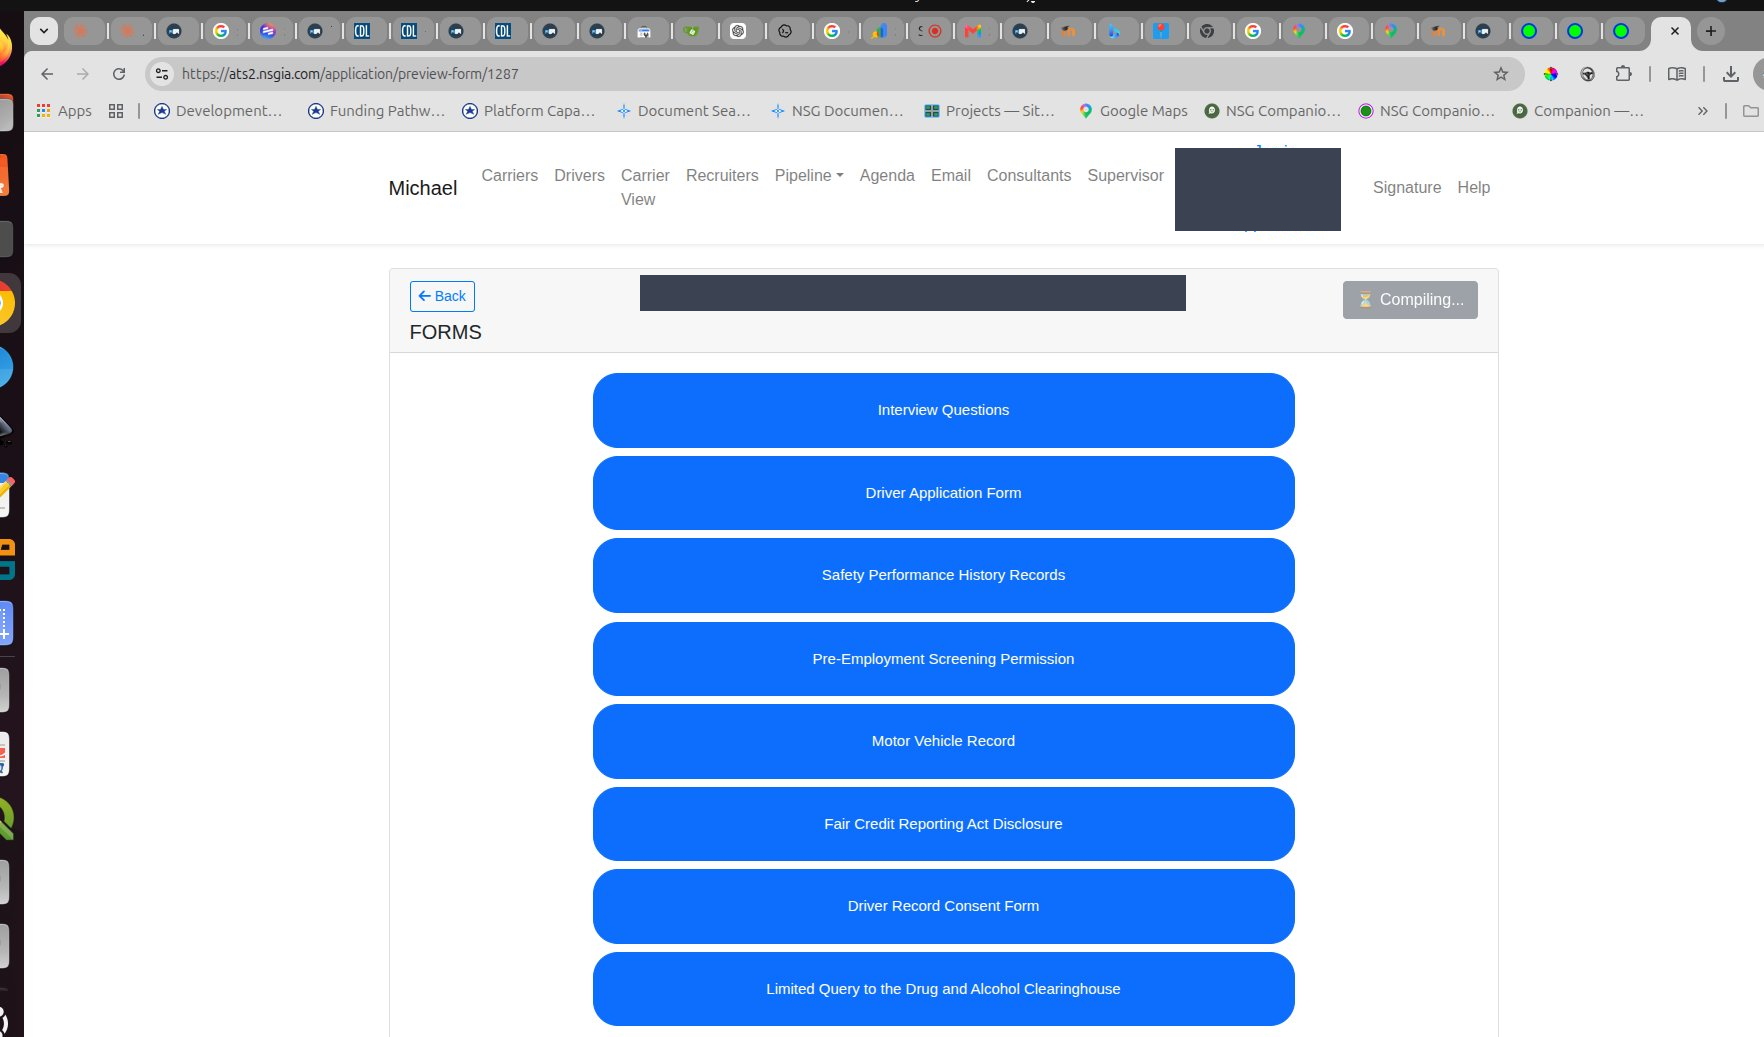
- Interview Questions
- Driver Application Form (the full 49 CFR § 391.21(b) employment application)
- Safety Performance History Records
- Pre-Employment Screening Permission (PSP)
- Motor Vehicle Record (MVR) authorization
- Fair Credit Reporting Act (FCRA) Disclosure
- Driver Record Consent Form
- Limited Query to the Drug and Alcohol Clearinghouse
This is the package that goes to the carrier. Each form opens for review and can be saved or printed.
Step 5 — Reading the accordion sections
Below the action buttons, the record has a column of collapsible sections. Each section is a part of the FMCSA application that the driver filled out:
- Interview Questions — your initial interview answers
- Previous Three Years Residency — every address the driver has lived at for the last three years
- License Information — CDL state, number, expiration, class, endorsements
- Medical Card Information — medical examiner's certificate, expiration
- Driving Experience — by equipment type (straight truck, tractor-trailer, doubles/triples, motorcoach, etc.)
- Accident Record for the Past 3 Years
- Traffic Convictions and Forfeitures for the Past 3 Years
- Employment History — three years, or ten years if the driver worked for a DOT-regulated employer in a CDL CMV role
- Education
- Other Qualification
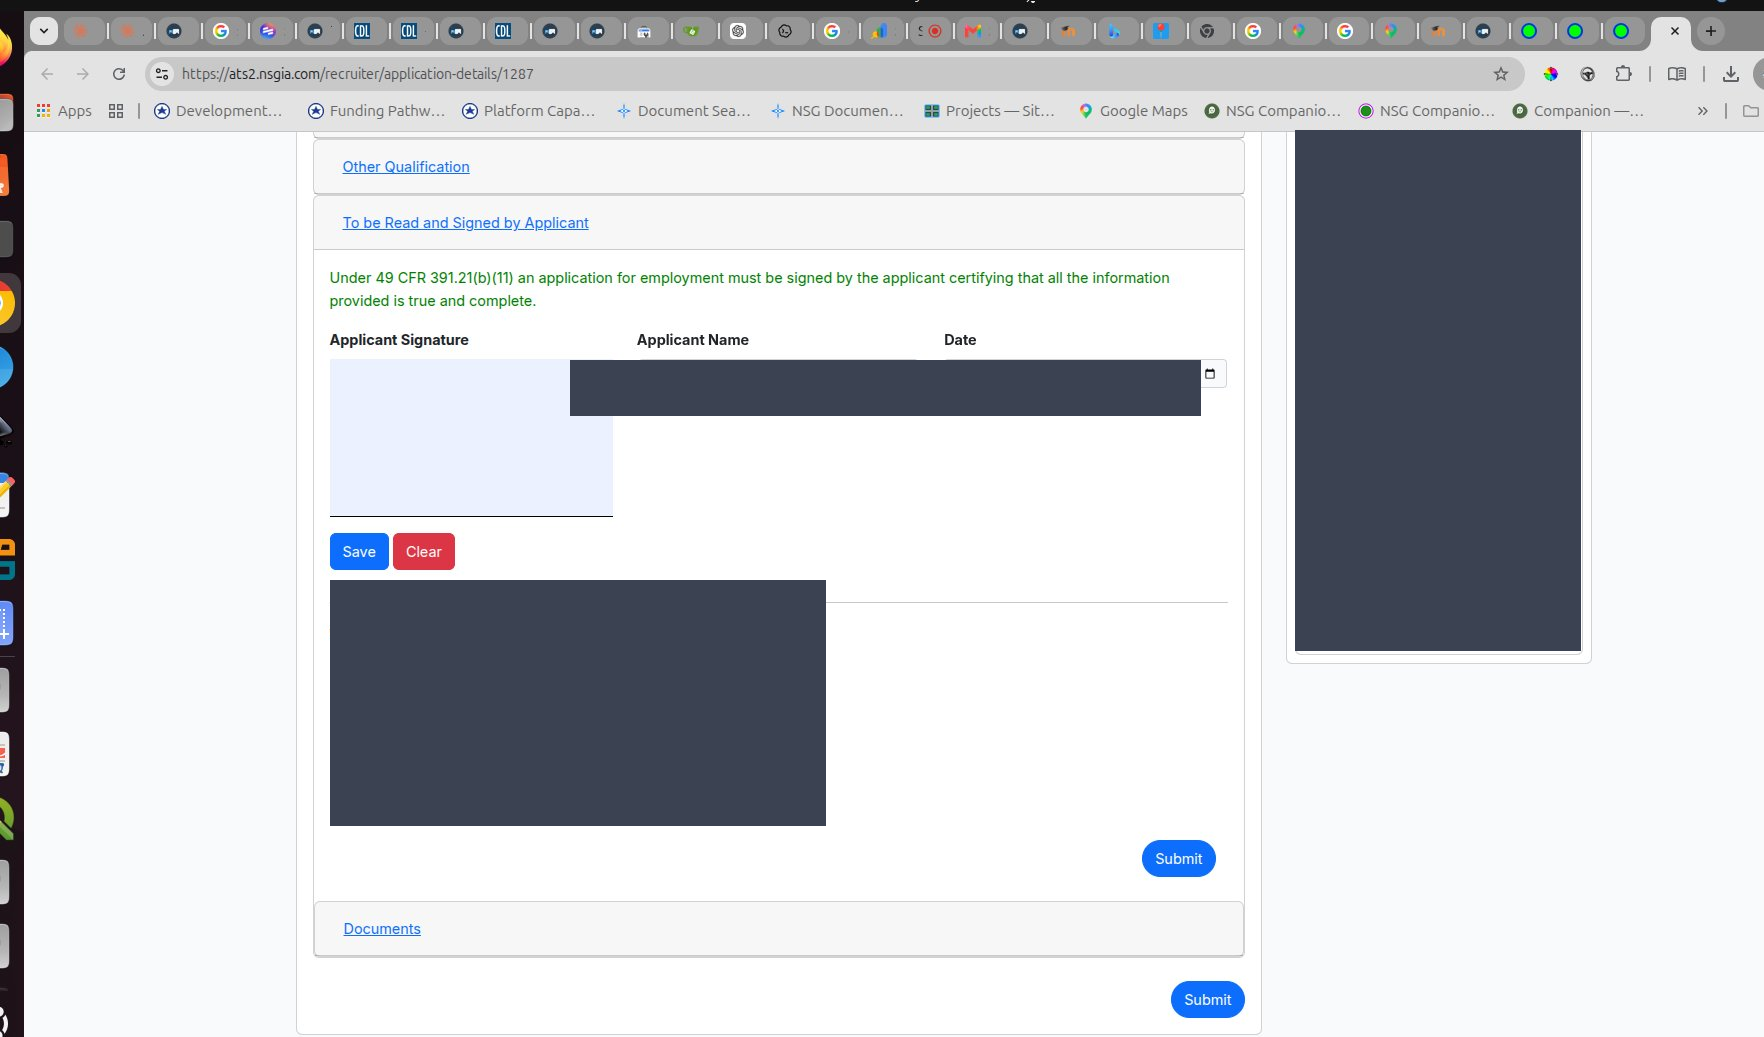
- To be Read and Signed by Applicant — the 49 CFR § 391.21(b)(11) certification statement, with the driver's signature, name, and date
- Documents
Click any section to expand it. Read every section before you send the record to a carrier. The carrier will read the same thing.
Step 6 — The Notes column on the right
The right side of the page has tabs: Notes, Sent, Replies, Schedule.
- Notes — every contact log entry, with date, recruiter name, and what happened.
- Sent — outgoing messages.
- Replies — incoming responses from the driver.
- Schedule — scheduled callbacks and follow-ups.
Read the Notes before any call to the driver. Add a note after every contact. The notes column is how the next recruiter who picks this driver up knows what has already happened.
Step 7 — The Documents section at the bottom
The last accordion section is Documents. This is where uploaded files live — front and back of the driver's license, the medical card, and anything else the driver or you have uploaded.
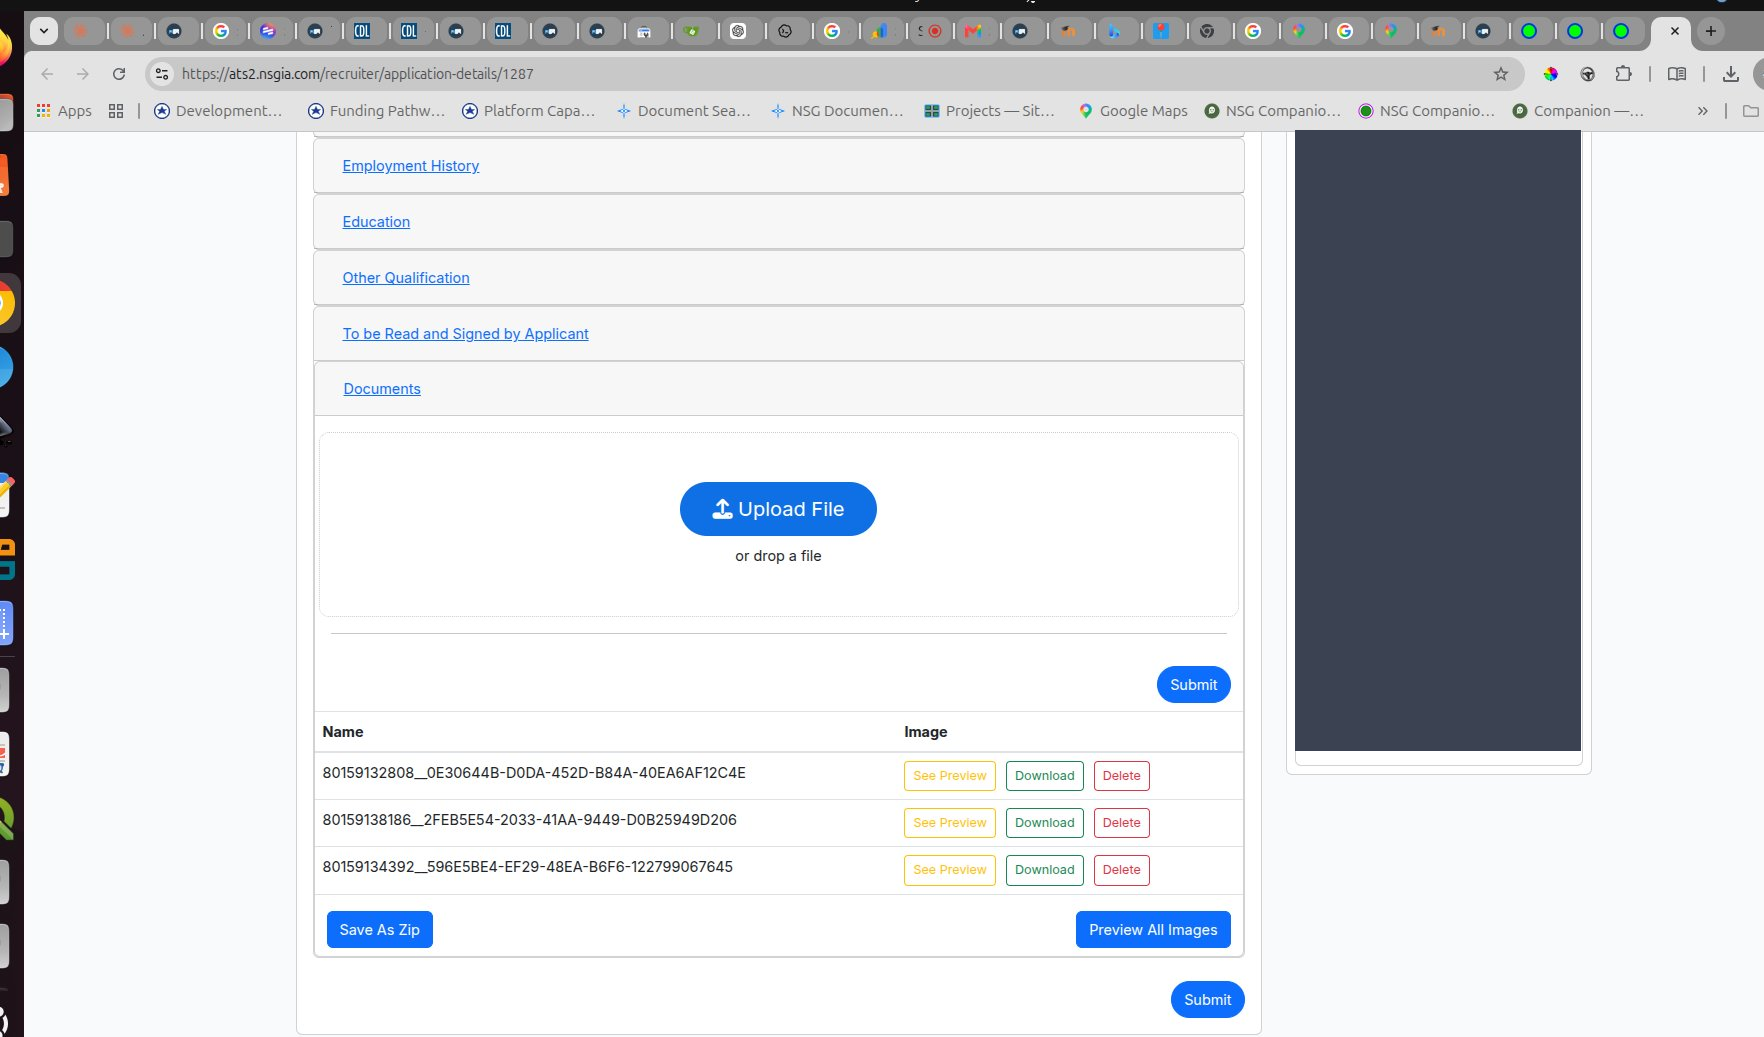
Each file row has buttons: See Preview, Download, Delete. At the bottom of the section: Save As Zip and Preview All Images. You can drop new files into the upload area at the top of the section.
Step 8 — Decide the next step
After you have read the record, decide what to do next:
- Send to the carrier. If everything is signed and complete, move the card to Carrier Acceptance and submit the package.
- Schedule a call. If something is missing or needs verifying, add a note, schedule a follow-up, and stay in Application Received.
- Hold. If the driver is not a fit right now, set Active Applicant to No. The record stays for later.
What happens after
- Carrier Acceptance means the carrier is reviewing the package. You do not have control over the outcome — the carrier does.
- Employed means the driver was hired. Move the card and add a note with the start date.
- If the carrier passes on the driver, move the card back to Application Received, add a note with the reason, and decide whether the driver fits another opening.
Quick guide to the page
| Where | What it is | What to do with it |
|---|---|---|
| Top bar | Driver name, contact, location, carrier, job, active flag | Quick read before any call |
| Green Forms button | All 8 FMCSA forms signed and ready | Click to review the package; this is what goes to the carrier |
| Accordion sections | The driver's FMCSA application, section by section | Read every section before sending the record out |
| Notes column (right) | Contact history | Read before any call; add a note after every contact |
| Documents (bottom) | License front/back, medical card, uploads | Confirm license is clear and medical card is current |
Do this
- Read the notes before you call the driver.
- Click into every accordion section before you send the record to the carrier.
- Confirm the Forms button is green before submitting.
- Verify the license images are clear and the medical card is current.
- Add a note after every contact, no matter how short.
Do not do this
- Do not screenshot the driver record. Federal law (49 CFR § 391.53) limits access to the hiring decision.
- Do not send the record to any carrier except the one you are placing the driver with.
- Do not skip the Notes column — it tells you what has already happened.
- Do not submit a record where the Forms button is not green.
- Do not use the driver record for anything other than the hiring decision.
Quick check before you send to the carrier
- Is the Forms button green?
- Have you read every accordion section?
- Are the license images (front and back) clear?
- Is the medical card present and current?
- Is the employment history complete for the last three years (ten years for CDL CMV work)?
- Have you read the Notes column?
- Is the carrier on the record the one you want to send the package to?
Questions: Michael Hoffman - 251-216-1933.
📋 Sample Quiz Questions (Preview)
Five questions cover the lesson above. The actual quiz requires a login to record a grade — these previews are open to everyone.
Question 1. What does it mean when the Forms button on the driver record is green?
- ✓ The driver has signed all eight FMCSA forms
- ○ The driver's license is expired
- ○ The driver is currently driving
- ○ The driver has not started the application
Why: The Forms button turns green when all eight FMCSA forms are signed. Until it is green, the package is not ready to send to a carrier.
Question 2. Which federal rule limits who can see the driver record?
- ✓ 49 CFR § 391.53 — access limited to those involved in the hiring decision
- ○ No federal rule — it is just company policy
- ○ HIPAA
- ○ The Americans with Disabilities Act
Why: 49 CFR § 391.53 requires the driver investigation history file to be kept in a secure location with controlled access, limited to those involved in the hiring decision, and used only for that decision.
Question 3. After running Parse Resume, where does the driver first appear?
- ✓ As a card in the Kanban "New" column
- ○ In the Documents section
- ○ In the Forms popup
- ○ On the carrier's website
Why: The parser creates a Kanban card in the "New" column. From there you move the card across stages as the driver moves through the pipeline.
Question 4. Where do you find the front and back of the driver's license?
- ✓ In the Documents section at the bottom of the driver record
- ○ In the Notes column on the right
- ○ On the Kanban card
- ○ In the Forms popup
Why: Uploaded supporting documents — license front and back, medical card, anything else — live in the Documents accordion at the bottom of the record.
Question 5. Most of the FMCSA application is already filled out by the time the driver sees it. Why?
- ✓ The parser pulls name, email, phone, location, and 3-year employment history from the pasted or uploaded resume
- ○ ProHRHQ types it in by hand
- ○ The carrier fills it in
- ○ The FMCSA fills it in
Why: The Parse Resume step extracts the basics from the resume so the driver only fills in what the resume cannot provide — DOT, license, medical, accidents, traffic, residency, signatures. Less friction for the driver, faster turnaround for the recruiter.
End of preview. The actual quiz requires login to record a grade.